Note: This post is part of the “Kamado 101 – The Definitive Guide to Amazing Barbecue” series, in which I cover everything from the foundational aspects of Kamado cooking all the way through advanced concepts designed to transform you into a backyard barbecue pitmaster. View the entire series here.
Your gaskets won’t need replaced super often, and of course it will vary depending on how much you use your Kamado. Normally they’ll need replaced every few years, and while it’s not quite as simple cleaning your kamado, this should only take you about an hour once you get the routine down!
What You Need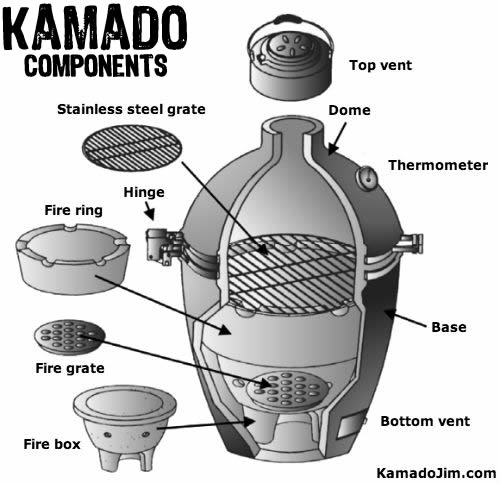
- Gasket Kit
- Shop Vac
- Cloth Rags
- Electric Drill (optional)
- Stripper Attachment (optional)
- Solvent
- Box Cutter
- Scissors
- Tape
- Tape Measure
- Bristle Brush
- Paint Scraper
Steps to Replacing Your Gasket
- Remove all of the old gasket material.
- Using a box cutter, you can easily cut the old gasket material and pull it off by hand. Get as much as you can off this way!
- Remove adhesive.
- Use your paint scraper (and a lot of pressure) around the edges of the base and dome to try to remove the rest of the gasket material and adhesives. If you want to take this to the next level and make sure you really get all of the adhesive off, you can use a stripper attachment on an electric drill— high speed, low pressure— to remove the rest of the adhesive. Be careful not to chip your ceramic!
- Brush away!
- Brush off the dome and the base to get rid of any sooty substances (also known as creosote) that might be flaking off into your food! All of this will just collect in the bottom of the base.
- Wipe with solvent.
- Using a clean cloth with a little bit of solvent, wipe down the edges of the base and dome. This step is important as it ensures a clean surface for your new gasket!
- Vacuum it out.
- This one is pretty self explanatory— vacuum out the base with a shop vac!
- Cut new material!
- When purchasing a Gasket Replacement Kit, you typically get 14′ of gasket material. You’ll need to cut these down to fit properly, and you’ll want two 6′ pieces for the base and dome (add a small piece of tape at the center of these pieces to make life a little easier later on) as well as a 2′ piece for the neck of the dome!
- Start with the neck.
- Remove any old material on the neck (it’s okay if it isn’t perfect) and then apply the 2′ piece of material. Make sure that the two ends of material are touching, so that the top vent will stay sealed, and trim down accordingly. Add the top vent to double check everything is fitting/sealing properly!
- Next comes the base.
- Start at the back center, 12:00 if you will, and begin adding the new material clockwise. You’ll want to make sure that the new material is lining up with the interior edge! The small piece of tape you placed in the center of these 6′ strips is to ensure that you have plenty of material cut— the tape needs to make it to 6:00! If there is any excess material, cut it with a box cutter but make sure the edges are touching and create a full seal.
- And the dome.
- Just like you did with the base, you’ll need to add the gasket material to the dome!
- Make sure it sets!
- You might see a little gap between your gaskets after you apply the new material. To get rid of this, you just need to put a half batch of charcoal in the grill and light it up! After about 5 minutes, you can close the dome (with the draft door and top vent fully open) and heat it to about 350°F. Then just press down on the handle a couple times to make sure everything is sealed properly, let the grill cool and leave overnight, and voila— your new gaskets should be all set!
I know I said this should take about an hour, but don’t be frustrated if it takes you a little bit longer your first try! Your Kamado will just be happy you are taking such good care of it! Do you guys have any tips for making the process of caring for your kamado easier? Share with me in the comments below.





Leave a Reply